When you ask anyone about the most tiring daily house chores, Kitchen cleaning often tops the list. At the same time, the importance of regularly cleaning kitchens and preventing grease buildup cannot be overstated. It is essential for maintaining the health of family members and avoiding the attraction of small household pests. As we understand firsthand the need for efficiency and speed, we wrote this guide to explore how to clean the kitchen efficiently with tried-and-true steps.
This article is a part our household cleaning series that includes guides on Kitchen Exhaust Fan Cleaning, How To Clean A Couch, Get Rid of Geckos, Clean Walls, Cleaning With Salt, Termites Extermination Tips and Identifing Small House Bugs.
The Importance of Regular Kitchen Cleaning
The significance of maintaining a clean kitchen extends far beyond aesthetics. Let’s start with some eye-opening stats:
In the United States, approximately 48 million cases of food poisoning are reported annually, according to the Centers for Disease Control and Prevention (CDC). These cases lead to 128,000 hospitalizations and 3,000 deaths each year. The primary causes are bacteria thriving in warm, moist environments due to improper food storage and inadequate kitchen cleaning.
Similarly, statistics from Saudi Arabia’s Ministry of Health in 2021 revealed about 10,000 cases of food poisoning annually. This has raised concerns about general kitchen hygiene, both in homes and restaurants.
Given these statistics, striving to maintain a clean and healthy kitchen environment is not a luxury or a task to postpone. Regular cleaning is a daily necessity that prevents the attraction of harmful pests like cockroaches and ants, and protects you from rodents like mice and geckos. These harmful intruders are drawn to leftover food and poor hygiene conditions, finding them ideal for breeding.
Regular cleaning and disinfection of your kitchen are crucial for several reasons:
- Cleaning your kitchen removes harmful germs and bacteria that can cause diseases. This helps maintain a healthier environment for your family.
- Ensuring that surfaces and cooking utensils are clean reduces the risk of cross-contamination. This is vital for food safety, as it prevents the transfer of bacteria from one item to another.
- A clean kitchen is less likely to attract small household bugs such as cockroaches and ants, which can carry and spread diseases. Regular cleaning keeps these pests away and maintains a hygienic space.
- Regularly cleaning your kitchen appliances prevents the buildup of grease and grime. This not only ensures they work efficiently but also extends their lifespan.
- A clean and organized kitchen creates a sense of peace and makes cooking more enjoyable. It contributes to a more pleasant and stress-free environment.

Dirty Kitchens Lead To Food Poisoning: Why So?
Food poisoning can often be traced back to issues within the kitchen environment. Key factors include:
- Warm, moist areas create an ideal environment for bacterial growth. Bacteria such as Salmonella and E. coli can thrive in these settings, posing significant health risks.
- Uncovered or improperly stored food allows bacteria to grow and spread, leading to contamination.
- Unclean surfaces and cooking utensils can result in cross-contamination, making it easier for bacteria to transfer from one item to another and to you, further increasing the risk of foodborne illnesses.
These factors collectively contribute to food contamination. When bacteria like Salmonella and E. coli multiply rapidly, the risk of food poisoning escalates, making kitchen hygiene an absolute priority for preventing such health issues.
Kitchen Cleaning Priorities: Key Areas That Need Your Attention
Certain areas in the kitchen are more prone to harboring harmful microbes and thus require special care. After cleaning, dry these surfaces with clean towels or paper towels, as germs thrive in moisture. Here are the key areas you should focus on:
1. Cutting Boards
Use an antibacterial spray before and during use when switching foods. It’s best to have a separate board for raw meats and clean it with a diluted bleach solution (one part bleach to nine parts water).
2. Eating and Cooking Utensils
Hot water kills germs on pots, pans, dishes, and silverware, not dishwashing liquid. Consider using a dishwasher if you can’t handle hot water. If you can’t wash dishes immediately, scrape off food residues but avoid soaking dishes for more than two hours, as stagnant water promotes bacterial growth.
3.Inside the Refrigerator
Prevent spills from contaminating other foods. Clean spills from raw meat with an antibacterial cleaner applied to a cloth, not directly on the shelf, or use antibacterial wipes. Always store raw meat on the bottom shelf to avoid contaminating other foods.
4. Dish Drainer
Wipe it with a diluted bleach solution or antibacterial cleaner after each use and ensure it is thoroughly dried.
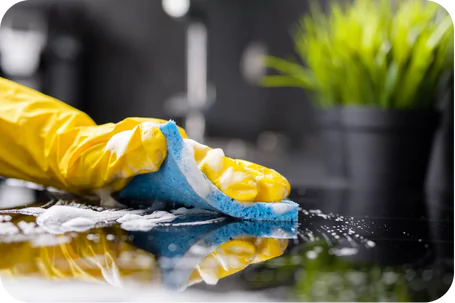
5. Cooking Surfaces
Use an antibacterial spray safe for food preparation surfaces. These areas can become germ hotspots as bacteria and viruses thrive in moist environments, so give them special attention when cleaning and drying.
6. Sink Drain and U-Bend
Pour about 60 ml (4 tablespoons) of pure bleach into the drain. After three minutes, run water through it and dry the drain opening.
7. Cleaning Sponges
Soak them in a very diluted bleach solution (20 ml [1½ teaspoons] to 5 liters [1 gallon] of water in a bucket). You can do this in the sink, but only if you are sure the metal in the drain can withstand it, as bleach can damage metal.
8. Tea Towels and Wet Cloth Towels
Wash them in the washing machine at a high temperature using biological powder or liquid.
By focusing on these key areas, you can significantly reduce the presence of harmful germs and bacteria, ensuring a healthier and more hygienic kitchen environment.

Preparing to Clean the Kitchen: How to Get Ready and Where to Start
When your kitchen is in disarray, cleaning becomes much more difficult. Therefore, it’s always recommended to organize and arrange tools and equipment before starting the cleaning process. This preparation makes it easier to access areas that need cleaning and makes the process more effective.
First: Declutter to Save Effort
A significant part of the kitchen cleaning task involves organizing the surface rather than actual cleaning. Hence, it’s best to put everything in its place before starting the cleaning. Organized surfaces look great and stay clean longer.
Using adhesive hooks can be a practical solution for hanging light items like aprons, towels, and plastic bags. Heavier items such as cups and cooking utensils are best hung on metal hooks fixed to the wall or cabinet. Not everyone has a knack for organization, but everyone can use the trick of a cluttered drawer or cabinet to temporarily store items and clear the space for cleaning.
Second: Wash the Dishes and Dispose of Food Scraps
After clearing obstacles and organizing clutter, start by throwing away food scraps from the corners of your kitchen into a trash bag. This doesn’t mean just cleaning the dishes of food residues but ensuring that all containers, pots, and kitchen tools are empty.
Third: Gather Your Cleaning Tools
Here is a list of essential tools needed for kitchen cleaning:
- Disinfectant wipes for quick use on surfaces and appliances.
- Multi-purpose cleaner for use on most surfaces.
- Antibacterial cleaner to sanitize food-contact surfaces.
- Glass cleaner for windows and mirrors.
- Wood cleaner to maintain wooden kitchen cabinets.
- Stainless steel cleaner for metal surfaces and appliances.
- Soft cloths for drying surfaces after cleaning.
- Cleaning sponges for deep cleaning of surfaces and utensils.
- Cleaning brushes for corners and tight spaces.
- Mop for cleaning floors.
- Bucket to use with the mop and water.
- Broom to remove large debris before mopping.
- White vinegar as a natural stain remover.
- Baking soda for deodorizing and polishing surfaces.
- Adhesive hooks to hang towels and aprons.
- Gloves to protect your hands from strong chemicals.
- Trash bags for collecting waste and easy disposal.
- Oven cleaner to remove accumulated grease.
- Microwave cleaner to clean and deodorize the microwave.
- Dishwasher cleaner to maintain its efficiency.
- Sanitizing solution to ensure germs and bacteria are eradicated.
Now that you have reduced the clutter, disposed of food scraps, and gathered your tools, it’s time to pay attention to each corner of your kitchen individually.
Step 1: Washing Dishes (Tips for Speed and Efficiency)
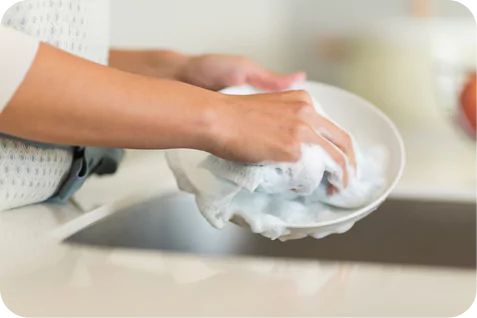
Washing dishes can be a tiring daily task, especially if done by hand. If you’re wondering how to speed up this process or how to use a dishwasher effectively, here are practical tips to make dishwashing easier, whether by hand or using a dishwasher, along with how to maintain your dishwasher for optimal performance.
1. Pre-Preparation
- Before you start washing dishes, gather all the pots and utensils in the kitchen sink and remove food residues from the dishes.
- Fill the sink with warm water and add a bit of dishwashing liquid. Let the dishes soak for a few minutes to make it easier to remove dirt and grease.
2. Start with the Least Dirty Items
- Begin with washing the least dirty items like cups and plates, then move on to more soiled items like pots and pans.
- This method helps keep the water and soap cleaner for longer, making the washing process more effective.
3. Use the Right Tools
- Use an appropriate sponge or cleaning brush for each type of dish. Use a soft sponge for cups and delicate plates, and a coarse brush for pots and pans.
- Use a bottle brush to clean deep containers and their tight corners. You can also use a special brush for cleaning forks and spoons.
4. Organize and Arrange
After washing the dishes, arrange them on the drying rack in an organized manner to save space and facilitate the drying process. Place larger, straighter dishes in the back and smaller cups and utensils in the front.
5. Rinse Well
After washing the dishes, make sure to rinse them thoroughly with clean water to remove any remaining dishwashing liquid.
6. Dry the Dishes
Use a clean towel to dry the dishes or let them air dry on the drying rack.
How to Use a Dishwasher
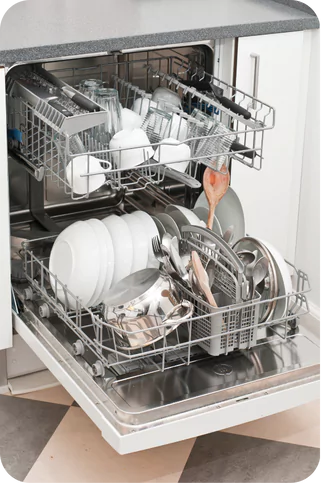
Using a dishwasher can significantly reduce the time and effort spent on washing dishes. Here’s a step-by-step guide to ensure you use your dishwasher effectively:
- Clean the dishes from food residues before placing them in the dishwasher. Scrape off any leftover food to prevent clogging and ensure better cleaning.
- Place dishes in the dishwasher in an organized manner so water can reach all parts. Put cups and small plates on the top rack, and larger pots and pans on the bottom rack. Ensure nothing blocks the spray arms.
- Use detergents specifically designed for dishwashers. Choose a detergent that suits the type of water in your area, whether it’s hard or soft.
- Select the appropriate washing program based on the type of dishes and their level of dirtiness. Most dishwashers have various programs, including quick washes and intensive cycles.
- Regularly add dishwasher salt to soften the water and prevent limescale buildup. Use a rinse aid to ensure dishes come out shiny and spot-free.
- Regularly check and clean the dishwasher’s filters and water spray arms to maintain its performance. This helps prevent blockages and ensures your dishwasher works efficiently.
How to Clean and Maintain Your Dishwasher
- Proper maintenance of your dishwasher ensures its efficiency and longevity. Here’s how to clean and care for your dishwasher:
- Remove the filters at the bottom of the dishwasher and clean them thoroughly under running water to remove food particles and debris.
- Regularly inspect the water spray arms to ensure they are not clogged. Use a small brush or needle to clean the tiny holes if necessary.
- Run an empty cleaning cycle using a dishwasher cleaner or a cup of white vinegar to eliminate odors and limescale buildup.
- After the cycle ends, leave the dishwasher door slightly open to allow the interior parts to dry and prevent mold growth.
- If any malfunction or issue arises, promptly have your dishwasher serviced by a qualified technician to prevent further damage and ensure proper functioning.
Step 2: How to Clean Ovens and Stovetops from Stubborn Grease
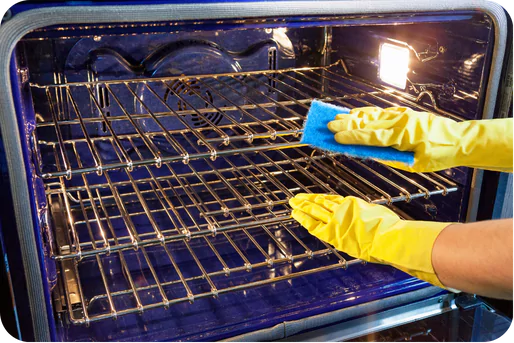
Cleaning ovens and stovetops is a crucial part of maintaining a clean kitchen and ensuring the efficiency and safety of your appliances. Here are the best steps to ensure effective and safe cleaning.
Follow the Manufacturer’s Instructions
Always refer to the user manual for your oven or heating device. Some ovens come with a self-cleaning lining that works without chemicals, burning off residue at high temperatures. This process can take several hours, so patience is key.
If you’ve lost the manual, you can usually find it on the manufacturer’s website or websites that provide various user manuals.
Cleaning Ovens and Stovetops
- Preparation for Cleaning
- Wear rubber gloves to protect your hands.
- Manually remove and dispose of any food remnants carefully.
- Ventilate the kitchen by opening windows or turning on the exhaust fan.
- Disassemble the stovetop burners and clean them separately.
- Protect the floor by laying down newspaper layers to catch any cleaner drips.
- Using the Cleaner
- Choose a strong cleaner specifically designed for stovetops and oven interiors.
- Follow all the product’s safety warnings, wear gloves, and ensure the room is well-ventilated while using the cleaner.
- Removing Stubborn Grease
- If you’re sensitive to chemicals, use baking soda on dirt and grease, then scrub with a damp steel wool pad. This method effectively removes dirt without harsh chemicals.
- Tip: When spills occur during cooking, sprinkle some salt on them and continue cooking. During cleanup, you’ll find the salt has absorbed the oil or grease, making it easier to remove.
- Cleaning Removable Parts
- If you can remove the glass from the oven door, soak it in soapy water.
- Clean the oven racks with the same soapy water and use a scrubbing pad or steel wool for tough stains.
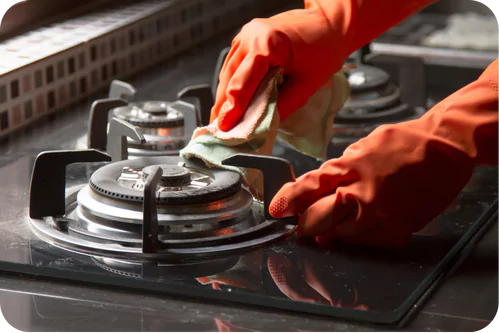
Cleaning Other Parts
- Gas Stove: Check the manual to see if the stove parts are dishwasher-safe. If they are, place them in the dishwasher. If not, use a thick creamy cleaner to clean them.
- Glass, Halogen, and Ceramic Cooktops: Avoid harsh chemicals on these surfaces. Instead, use a damp cloth with water. For major spills, use a plastic scraper or a special cooktop scraper. Regularly use the oven conditioner sold by the manufacturer to keep the glass clean.
- Microwave:
- Wipe the interior after each use with a cloth dampened with soapy water.
- Use half a lemon in a bowl of water and heat it in the microwave for 15 minutes to loosen tough residues, then easily wipe away the softened grime.
Step 3: Cleaning and Polishing Kitchen Surfaces
We understand that dealing with different kitchen surfaces can be confusing, especially when it comes to using the right products for each type. It’s easy to fall into the trap of using the same cleaner for all types of marble, tiles, or cabinets, but this approach is not always the best and can sometimes damage the surface.
Importance of Sanitizing Food-Contact Surfaces
When cleaning your kitchen, it is crucial to consider that surfaces that come into direct contact with food need to be sanitized with antibacterial cleaners. While multi-purpose cleaners are effective for stain removal, they may not provide sufficient protection against germs. Therefore, choose an antibacterial cleaner for surfaces like countertops, stovetops, and utensils that come into direct contact with food.
Can You Use Bleach?
For effective cleaning, avoid using bleach on surfaces that can easily lose color or erode, as bleach may cause surface corrosion or discoloration. Instead, use safe and effective cleaners according to the surface type, whether it is marble, granite, tile, or treated wood.
Here, we explore the best ways to clean and sanitize various kitchen surfaces, focusing on maintaining cleanliness and health. We also cover the tools and products you can use.
Polishing Kitchen Surfaces Based on Surface Type
Cleaning kitchen surfaces depends significantly on the material they are made of. Here are detailed tips on how to clean and sanitize each type of surface to achieve optimal results:
- Cleaning Granite Kitchen Surfaces
- Use an antibacterial spray cleaner. It is crucial to dry the surface completely after cleaning to ensure all cleaner residues are removed and to prevent moisture buildup, which can lead to germ growth.
- Avoid acidic or abrasive materials as they can damage the surface. Granite requires special care to maintain its shine and durability.
- Cleaning Glossy Laminate Surfaces
- Use an antibacterial and germicidal spray cleaner. The surface must be dried thoroughly after cleaning.
- Avoid using bleach or abrasive materials as they can scratch the surface, change its color, or dull the shine.
- Cleaning Regular Marble Surfaces
- Wipe the surface with a soapy solution made from regular dishwashing liquid and water. Use gentle types that are easy on the hands as they are less harsh on marble.
- Ensure the surface is rinsed thoroughly after cleaning, as cleaner residues can make the marble look dull. Avoid acidic cleaners as they can erode the surface.
- Don’t forget to dry the surface thoroughly.
- Cleaning Kitchen Tiles
- Use a multi-purpose cleaner or a microfiber cloth to clean the tiles.
- Pay special attention to the gaps between the tiles by using a small brush and an appropriate cleaner to remove dirt and stains.
- Cleaning Treated Wood in Cabinets and Floors
- Use a diluted bleach solution consisting of 20 ml (about 1.5 tablespoons) of bleach in 5 liters (1 gallon) of water. Work quickly to ensure the wood does not change color.
- After cleaning, dry the surface thoroughly. You can use a light wood polish if you prefer an extra shine.
Step 4: How to Clean the Inside of the Refrigerator
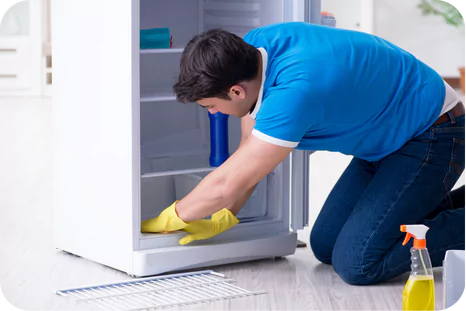
Maintaining a clean refrigerator ensures your food stays fresh and safe to consume. While most modern refrigerators don’t require manual defrosting, it is crucial to keep the drip hole clean to prevent ice buildup. Here are detailed steps to clean your refrigerator effectively:
- Locate the Drip Hole
- Check for the drip hole above the main shelf or behind the refrigerator shelves. If there is ice buildup, let it melt by opening the door or use a spoon gently to remove it.
- Use cotton gloves if you have sensitive skin or feel cold easily during cleaning.
- Effective Cleaning
- Clean one shelf at a time to avoid exposing all the food to warm air. Place the food on a large tray while cleaning each shelf.
- Start with the top shelf. Remove the food and wipe the shelves with a damp cloth. For stained shelves, remove them and wash in the sink with warm soapy water.
- Thoroughly clean the vegetable and meat drawers, removing any accumulated dirt. Use a bit of olive oil to remove color stains and a plastic spatula to scrape off stuck-on foods.
- Removing Odors
- Place a covered jar filled with baking soda, which is also used for cleaning couches and removing scribbles from walls, on a shelf in the refrigerator to help remove odors.
- Cleaning the Exterior of the Refrigerator
- Wipe the exterior of the refrigerator with a damp cloth. Use a mild cleaner to remove tough marks and keep the surface shiny.
- Pull out freestanding refrigerators and clean the coils at the back using the crevice tool on your vacuum cleaner.
Optional Step: How to Defrost the Freezer
Defrost the freezer when ice buildup becomes noticeable or before a big shopping trip to save space. Ice buildup in the freezer is often due to frequent door openings or a leaky door seal. Follow these steps:
- Preparation: Turn off the freezer and transfer the food to a cooler.
- Defrosting
- Leave the door open and wait for the ice to melt, placing a deep tray at the bottom to catch the water.
- In chest freezers, open the drain valve and place a wash basin underneath.
- Speed up the process by placing bowls of hot water on the shelves.
- Cleaning
- Wipe the interior with a gentle, odor-free cleaner or a solution of warm water and baking soda (one teaspoon of baking soda per half liter of water).
- Dry thoroughly with a lint-free cloth.
Step 5: How to Clean Wooden Kitchen Cabinets and Drawers
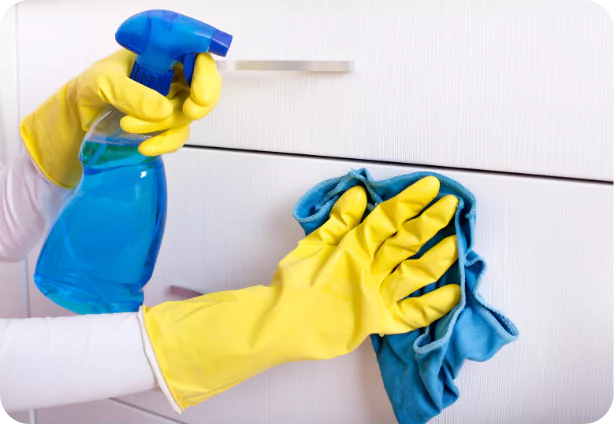
Cleaning the cabinet doors and drawers often gets overlooked during daily cleaning sessions. Regular care is essential for the safety and beauty of your kitchen though. Here are effective ways to clean different types of kitchen cabinet and drawer surfaces:
1. High-Gloss Wood Cabinets
- Use only soft cloths to avoid scratches. Wipe off dirt first before tackling stains with a little dishwashing liquid.
- Avoid harsh materials as they can damage the glossy surface. You can also use a special polish for high-gloss surfaces to maintain their shine.
- Stains can quickly accumulate on glossy laminates, so clean them regularly. A spray cleaner that handles tough stains without damaging the surface is recommended.
- Make sure not to let cleaner droplets dry on the surface.
2. Treated and Coated Wood
- Dilute 30 ml (about 2 tablespoons) of soap wood cleaner in 5 liters (1 gallon) of warm water and wipe the entire surface, then dry with a soft cloth. No need to rinse. Occasionally, you can polish it with a light liquid wax if you prefer a shine.
- Avoid using bleach or harsh cleaners that may change the wood’s color. Regularly polishing the wood is recommended to keep its attractive appearance.
3.Untreated Wood
- Untreated wood is not ideal for kitchens as it tends to darken over time regardless of how often you clean it. Using water for cleaning may cause the wood to warp.
- To preserve the appearance and color of untreated wood, it is best to cover it with a light layer of varnish to protect it from wear and deformation. You can also use a special wood polish to maintain its shine.
Additional Tips for Cleaning Kitchen Cabinets and Drawers
- Wipe dirt and dust daily using a soft cloth dampened with a little warm water. This prevents stains from accumulating.
- Use a solution of water and vinegar to clean deep and stubborn stains. Mix half a cup of white vinegar with half a cup of water and gently wipe the stains with a soft cloth.
- After cleaning, be sure to dry surfaces thoroughly to prevent moisture buildup, which can lead to bacterial and fungal growth.
Step 6: Cleaning Kitchen Ceramic Floors and Walls
Cleaning ceramic kitchen floors and walls is an essential part of maintaining a clean and healthy cooking environment. Here are some important tips to help you achieve this effectively:
Preparation for Cleaning
- Before starting the cleaning process, remove the dirt and dust from the floors and walls using a broom or a dry mop. This makes the cleaning process easier and prevents dirt from turning into tough stains when water is added.
- Ensure you have all necessary cleaning tools ready, such as a bucket, mop, soft cloth, ceramic cleaner, and a soft-bristle cleaning brush.
- Regularly inspect floors and walls for cracks or damage to the ceramic. Address any issues immediately to prevent them from worsening.
Using an Appropriate Cleaner
- Use a cleaner specifically designed for ceramics, as these cleaners are effective at removing grease and dirt without negatively affecting the color and shine of the ceramic.
- Follow the instructions on the cleaner’s package to prepare the solution. If you prefer natural solutions, you can use a mixture of warm water and white vinegar.
Start with Cleaning Kitchen Walls
Use a soft cloth dampened with the cleaning solution to wipe the walls in circular motions. Avoid abrasive materials that might scratch the surface, and use a small brush to reach corners and tough spots.
Move to Cleaning the Floors
- Fill the bucket with warm water and add the appropriate amount of cleaner. Use the mop to clean the floors in circular motions, covering the entire surface.
- For tough stains, use a soft-bristle cleaning brush to gently scrub the stain. You can use a mixture of baking soda and water to form a paste, apply it to the stain, and leave it for a few minutes before scrubbing.
Rinsing and Drying
- After cleaning, rinse the floors and walls with clean water to remove any cleaner residue.
- Use a clean towel or a dry mop to dry the floors and walls thoroughly. Ensuring the floors are completely dry prevents stain formation, gives them a shine, and reduces the risk of slipping.
Additional Step: How to Clean the Inside of an Electric Boiler (Kettle)
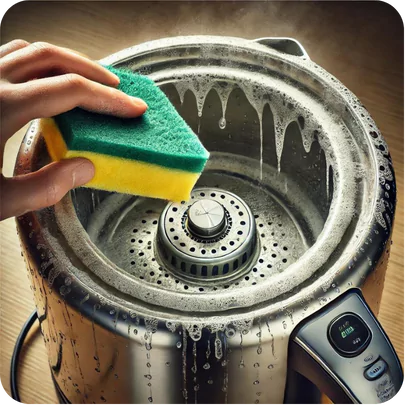
Regularly cleaning your electric boiler is crucial for maintaining its efficiency and ensuring it remains free from limescale buildup, which can affect its performance, the cleanliness of the water, and your health. Here are effective steps to clean the inside of your boiler:
Before You Start – Required Tools:
- Commercial descaling agent specifically for electric kettles.
- Or distilled white vinegar.
- Clean water.
Steps to Clean the Boiler
A. Using a Commercial Descaler:
- Turn off and empty the boiler, then unplug it.
- Fill half the kettle with clean water.
- Add the commercial descaling agent according to the instructions on the package.
- Let the descaler react with the water inside the kettle for 15-30 minutes.
- After the specified time, thoroughly rinse the kettle with clean water.
- Boil clean water in the kettle at least twice before using it again to ensure any descaler residues are removed.
B. Using Distilled White Vinegar:
- Turn off and unplug the kettle.
- Fill half the kettle with equal parts of water and distilled white vinegar (200 milliliters of water and 200 milliliters of vinegar).
- Leave the mixture in the kettle overnight to dissolve the limescale.
- In the morning, discard the solution and rinse the kettle thoroughly with clean water.
- Boil clean water in the kettle at least twice to ensure all vinegar residues are removed.
Important Notes
- It is recommended to clean the boiler every 3-6 months or when you notice limescale buildup.
- Using white vinegar is a natural and economical option for descaling.
- Ensure to boil clean water twice after each cleaning process to guarantee the kettle is completely clean.
FAQ: Common Questions About Kitchen Cleaning
Here are some frequently asked questions about cleaning and maintaining your kitchen, with answers to help you keep your kitchen clean and healthy.
How long does it take to clean a kitchen?
The duration of cleaning the kitchen depends on the size of the kitchen, the level of dirt, and the number of tasks to be done. Here’s a breakdown of the expected time to clean the kitchen based on your cleaning frequency:
1. Daily Cleaning:
- Washing dishes: 15 to 30 minutes, depending on the amount of dishes.
- Wiping and cleaning surfaces: 10 to 15 minutes.
- Cleaning the floors: 10 to 20 minutes, depending on the size of the kitchen.
- Emptying the trash: 2 to 3 minutes.
Total time: Approximately 30 to 60 minutes.
2. Weekly Cleaning:
- Cleaning small appliances (microwave, toaster, etc.): 15 to 30 minutes.
- Wiping surfaces and walls: 20 to 30 minutes.
- Cleaning the oven and stovetop: 30 to 45 minutes.
- Cleaning the refrigerator (shelves and removing expired food): 30 to 45 minutes.
- Deeper floor cleaning: 20 to 30 minutes.
Total time: Approximately 1.5 to 2.5 hours.
3. Monthly Cleaning:
- Deep cleaning the refrigerator (defrosting if needed): 45 to 60 minutes.
- Cleaning the chimney or kitchen hood: 30 to 45 minutes.
- Cleaning the insides of cabinets and drawers: 45 to 60 minutes.
- Cleaning windows and vents: 30 to 45 minutes.
- Cleaning lights and fans: 15 to 30 minutes.
Total time: Approximately 3 to 4 hours.
4. Deep Cleaning (every 6 months to a year):
- Thoroughly cleaning walls and ceilings: 1 to 2 hours.
- Cleaning large appliances (inside the refrigerator and oven): 1.5 to 2.5 hours.
- Deep cleaning floors (including removing tough stains): 1 to 2 hours.
- Cleaning and organizing the pantry: 1 to 2 hours.
Total time: Approximately 5 to 8 hours.
Tips to Reduce Kitchen Cleaning Time
- Clean pots and utensils while cooking to avoid a pile-up after finishing.
- Regularly do small cleaning tasks to prevent dirt buildup and make deep cleaning easier and faster.
- Choose effective cleaners that save time and effort in removing stains and dirt.
- Divide cleaning tasks among family members to reduce the overall time required.
How do I sanitize the kitchen?
Sanitizing the kitchen ensures a clean environment free of bacteria, making your food safe. Here are simple steps to do so:
1. Gather Necessary Tools:
- Rubber gloves to protect your hands.
- Multi-purpose cleaner for surface cleaning.
- Disinfectant wipes or spray for sanitizing surfaces.
- White vinegar for natural disinfecting.
- Baking soda for additional cleaning and disinfecting.
- Sponge and clean cloth for wiping surfaces.
- Warm water for rinsing.
2. Clean Surfaces:
- Start by removing dirt using a multi-purpose cleaner and sponge.
- Rinse the cleaner residues with a cloth dampened with warm water.
3. Sanitize Surfaces:
- Spray surfaces with disinfectant wipes or spray.
- Mix one part vinegar with two parts water in a spray bottle, spray, and wipe surfaces.
- Use baking soda to disinfect the sink and dirty areas by sprinkling it and scrubbing with a sponge dampened with water and vinegar.
4. Clean and Sanitize Appliances:
- Microwave: Heat half a lemon in a bowl of water for 5 minutes, then wipe the interior.
- Refrigerator: Wipe the shelves with water and baking soda, then sanitize with white vinegar.
- Oven: Clean with a dedicated cleaner, rinse, and then sanitize.
- Dishwasher: Run an empty cycle with a cup of vinegar or a dedicated cleaner.
5. Clean and Sanitize Floors:
- Sweep the floors to remove dirt and dust.
- Wash floors with warm water and cleaner, adding a little vinegar for extra sanitizing.
- Sanitize floors by spraying floor disinfectant and letting it air dry.
6. Dispose of Waste:
- Empty the trash can and clean it with soap and water.
- Sanitize the trash can by spraying disinfectant and letting it air dry before placing a new liner.
