Salt, that humble ingredient found in every kitchen, goes far beyond merely enhancing the flavor of food. Thanks to its unique natural properties, cleaning with salt can be a powerful weapon for tackling various areas and objects in your home. From cleaning carpets with salt to polishing surfaces, or even removing stubborn stains from furniture and clothing, salt offers an ideal, cost-effective solution for efficient cleaning.
In this guide, we’ll explore the top uses of salt in cleaning, complete with easy-to-follow recipes and practical examples you can apply in your home. Whether you’re dealing with tough stains, musty odors, or simply looking for a natural way to refresh your living space, salt might just be the versatile cleaning superhero you’ve been overlooking.

In previous articles, we’ve covered effective methods for repelling geckos, dealing with common small household bugs, cleaning sofas, removing stains from walls, and we’ve also provided detailed steps for kitchen cleaning. Today, we bring you a complete article packed with valuable and useful information about using salt for cleaning purposes.
Why is Cleaning with Salt Effective?
Salt possesses several properties that make it a powerful and effective natural cleaner. These characteristics include:
- Gentle Abrasive Action: The coarse grains of salt act as a mild abrasive that can scrub away dirt and stains without scratching surfaces. This makes salt particularly useful for cleaning delicate materials like copper pans or marble countertops.
- Absorption of Odors and Moisture: Salt is hygroscopic, meaning it attracts and holds water molecules from its surroundings. This property helps it absorb unpleasant odors and excess moisture, keeping surfaces clean and dry. For instance, placing a bowl of salt in your refrigerator can help eliminate food odors.
- Synergistic Cleaning Power: When salt is mixed with other ingredients like vinegar or baking soda, it can react to form powerful cleaning solutions that remove stubborn dirt and stains. This chemical synergy enhances the cleaning effectiveness of each component.
- Antibacterial and Antifungal Properties: Salt has natural antibacterial and antifungal properties, which help disinfect surfaces and eliminate germs. While not as potent as commercial disinfectants, salt can still contribute to a more hygienic environment, especially when used in conjunction with other natural cleaners.
- Readily Available and Economical: Found in almost every household and priced affordably, salt is an economical and efficient choice for cleaning. Its versatility makes it a cost-effective alternative to many specialized cleaning products.
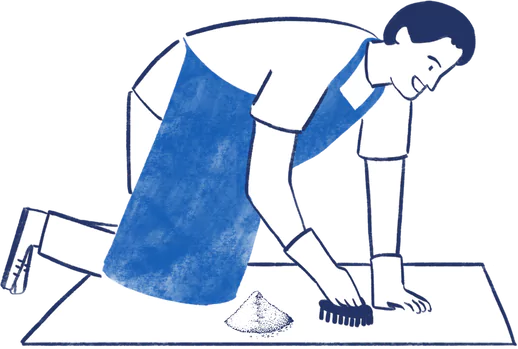
Cleaning Carpets with Salt
Carpets face numerous daily challenges such as spills, food stains, mud, unpleasant odors, small bugs, and even pet stains. These stains can be tough and require special care to remove without damaging the carpet or altering its color.
Salt proves to be a highly effective natural ingredient for cleaning carpets for several reasons:
- High Absorption Capacity: Salt can absorb liquids effectively, making it a great choice for removing wet stains and spills from carpets.
- Antibacterial and Antifungal Properties: Salt’s natural antibacterial and antifungal properties help disinfect the carpet, eliminating germs and bacteria that might cause bad odors or health issues.
- Non-Toxic and Safe: Being a natural and non-toxic substance, salt is a safe option for homes, especially those with children or pets. This reduces the risk of exposure to harmful chemicals found in some commercial cleaning products.
Recipe and Steps For Cleaning Carpets with Salt
Ingredients:
- Coarse salt
- Baking soda
- White vinegar
- Warm water
- Soft brush or cloth
- Vacuum cleaner
Method:
- Prepare the Carpet: Begin by vacuuming the carpet to remove any surface dirt and dust before cleaning with salt.
- Apply Salt: Sprinkle a layer of coarse salt directly onto the dirty areas or wet stains. If using baking soda, mix it with the salt in equal parts.
- Absorption Period: Let the salt sit for 15-30 minutes to absorb moisture and odors.
- Scrub Gently: Use a soft brush or cloth to gently spread the salt over the stains. For tough stains, you can use a mixture of salt and vinegar to scrub the area.
- Vacuum the Salt: Use the vacuum cleaner to remove the salt and any remaining dirt from the carpet.
- Final Clean: Wipe the cleaned areas with a cloth dampened with warm water, then dry them thoroughly.
By following these steps, you can effectively clean your carpet using salt, ensuring a fresh and hygienic environment without the use of harsh chemicals.
Removing Coffee and Tea Stains from Cups with Salt
Coffee and tea cups often develop stubborn stains that accumulate over time, leaving unsightly marks on the cup walls. These stains, caused by tannins in coffee and tea, can be tough to remove with regular cleaning products and may make the cups unsuitable for use by family members or guests.

Why Salt is Effective for Removing Coffee and Tea Stains
Cleaning with salt is an ideal solution for removing coffee and tea stains due to several factors that make it effective and preferred for household use:
- High Tannin Breakdown Capability: Salt excels in breaking down tannins and organic compounds that cause stains. The coarse grains scrub the stains gently, making the removal process faster and more efficient.
- Gentle on Surfaces: Unlike some harsh chemicals, salt is a natural and gentle substance that won’t scratch or damage the cups during the cleaning process.
- Ease of Use: Cleaning with salt doesn’t require special tools or complex preparations. Anyone can use it easily and effectively at home.
- Antibacterial Properties: Salt has antibacterial properties, which help disinfect the cups and eliminate unpleasant odors.
Method for Removing Coffee and Tea Stains from Cups Using Salt
Ingredients:
- Coarse salt
- Warm water
- Sponge or cloth
Instructions:
- Preparation: Ensure the cups are dry before starting.
- Apply Salt: Place a suitable amount of coarse salt directly onto the stains inside the cup.
- Scrubbing: Dampen the sponge or cloth with warm water and start gently scrubbing the salt onto the stains in circular motions. Continue scrubbing until the stains begin to fade.
- Rinse: Rinse the cup thoroughly with warm water to remove any salt residues.
- Repeat if Necessary: For tough and persistent stains, you may need to repeat the process until the stains are completely gone.
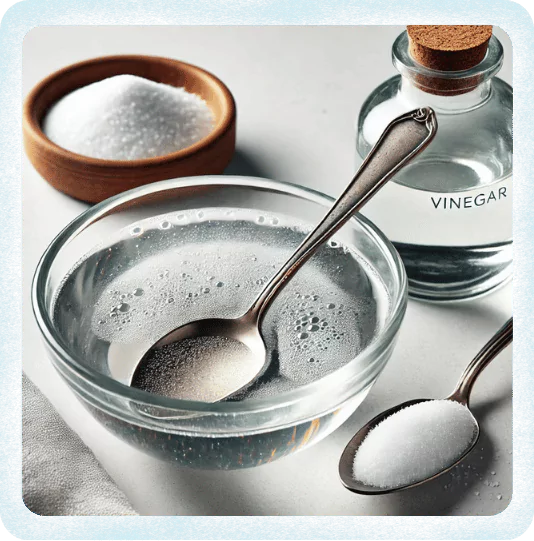
Polishing Copper and Silver Using Salt and Vinegar
Household items made of copper and silver can become tarnished and dull over time due to oxidation and dirt buildup. To restore their original shine, effective cleaning solutions are necessary. Salt and vinegar, with their unique properties, stand out as excellent choices for polishing these metals. Understanding the chemical and physical properties of salt and vinegar and their interaction with metals like copper and silver explains their effectiveness.
Abrasive Properties of Salt:
- Salt Grains: The coarse grains of salt help remove dirt and buildup from metal surfaces without causing scratches, acting as a gentle abrasive.
- Oxidation Removal: Salt aids in removing the oxidized layer from metals, restoring the original shine of copper and silver.
Chemical Properties of Vinegar:
- Acetic Acid Content: Vinegar contains acetic acid, typically in a concentration of 4-8%. This mild acid effectively dissolves metal oxides that form on the surface of copper and silver due to their reaction with oxygen in the air.
- Oxide Dissolution: When acetic acid interacts with copper oxide (the green layer) or silver oxide (the black layer), a chemical reaction occurs, dissolving these oxides and removing them from the metal surface.
Combined Action of Salt and Vinegar:
- Forming a Paste: Mixing salt with vinegar creates a paste where salt grains are surrounded by acetic acid, facilitating both chemical and mechanical scrubbing of dirt and oxides.
- Enhanced Cleaning Efficiency: The acetic acid in vinegar reacts with the metal oxides, while the salt grains mechanically scrub and remove these oxides. This simultaneous action enhances the cleaning and polishing process.
Method for Polishing Copper and Silver with Salt and Vinegar
Ingredients:
- Coarse salt
- White vinegar
- Flour (optional)
- Soft cloth or sponge
Instructions:
- Preparation: Ensure the metal pieces are dry before starting.
- Mixing: In a bowl, mix equal parts of salt and vinegar. If a thicker paste is desired, add flour to the mixture.
- Application: Apply the mixture or paste to the surface of the copper or silver, covering all tarnished or dull areas.
- Scrubbing: Use a soft cloth or gentle sponge to rub the mixture onto the metal in circular motions. Continue scrubbing until the stains and dirt start to disappear.
- Waiting Period: Let the mixture sit on the metal for a few minutes to allow effective action on the dirt and oxidation.
- Rinsing: Rinse the metal piece with warm water to remove any residue from the mixture.
- Drying and Polishing: Dry the metal with a clean, soft cloth, then polish it to restore its shine.
- Detailed Cleaning: Use a soft toothbrush to reach intricate details or engravings on the metal piece.
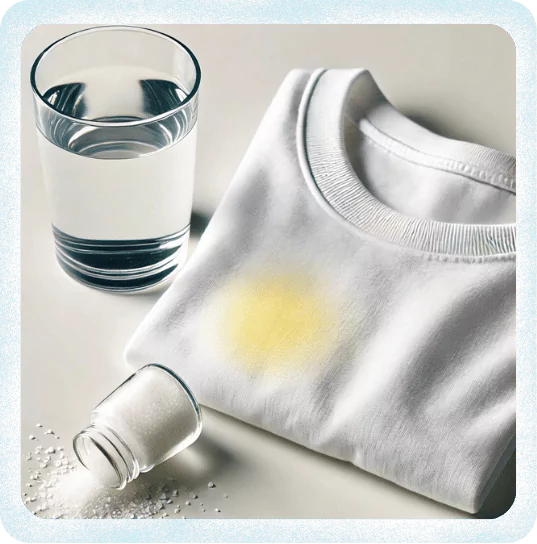
Cleaning Yellow Stains from White Cotton and Fabrics Using Salt
Over time, white clothes and fabrics are prone to yellow stains caused by sweat, natural body oils, or long-term storage. These stains can be challenging to remove and negatively impact the appearance of the fabrics, making them look old and dirty.
Why Cleaning with Salt is Effective in Removing Yellow Stains
Salt is an effective natural ingredient for cleaning stains for several reasons:
- Granular Texture: The granular texture of salt helps break down dirt and stains from the fabric fibers without causing damage. This makes it capable of removing deep-seated stains that can accumulate over time.
- Moisture and Oil Absorption: Salt’s high absorption capacity helps remove stains caused by sweat and natural oils.
- Chemical Reactions with Other Ingredients: When salt is mixed with other ingredients like vinegar or lemon juice, a chemical reaction occurs that enhances the cleaning effectiveness. For example, acetic acid in vinegar or citric acid in lemon can react with dirt and stains, making them easier to remove.
- Breaking Down Organic Compounds: The interaction between salt and acids helps break down organic compounds that form yellow stains, making the stains more removable during scrubbing or washing. The salt granules enhance the effectiveness of the acids by providing additional surface area for the reaction, making the cleaning process more efficient.
Recipe: Ingredients and Method
Ingredients:
- Coarse salt
- Lemon juice or white vinegar
- Warm water
- Soft brush or cloth
Instructions:
- Preparation: Ensure the fabric is dry before starting.
- Mixing: In a bowl, mix half a cup of salt with half a cup of lemon juice or white vinegar. If the stain is large, increase the quantities proportionally.
- Application: Apply the mixture directly onto the yellow stain, ensuring the stain is completely covered.
- Scrubbing: Use a soft brush or cloth to gently scrub the mixture onto the stain in circular motions. Continue scrubbing until the stain begins to fade.
- Waiting Period: Let the mixture sit on the stain for 30 minutes to an hour to effectively work on removing the stain.
- Rinsing: Rinse the fabric with warm water to remove any residue from the mixture.
- Washing: Wash the fabric in the washing machine using regular detergent. After washing, air dry the fabric outdoors under the sun if possible, as sunlight naturally helps bleach white fabrics.
For stubborn stains, you can add baking soda to the salt and lemon juice mixture to increase the cleaning effectiveness. After rinsing, quickly dry the fabric to avoid any new stains from forming.
Cleaning Grease from Cookware Using Salt
Removing accumulated grease from cookware, such as pans and pots, can be challenging with regular detergents. Salt, however, offers an effective solution due to its unique properties.
Why Salt is Effective for Removing Grease
- Abrasive Texture: The coarse grains of salt help break down and dislodge layers of grease without scratching the surface of the cookware.
- Absorption Capability: Salt can absorb oils and grease, making it efficient in removing greasy layers.
- Chemical Reaction: When combined with other ingredients like hot water or vinegar, salt can form a solution that dissolves grease effectively.
Method for Cleaning Grease from Cookware with Salt
Ingredients:
- Coarse salt
- Hot water
- Sponge or cleaning brush
- White vinegar (optional)
Instructions:
- Sprinkle Salt: Sprinkle a generous amount of coarse salt directly onto the greasy cookware.
- Scrub with Hot Water: Use a sponge dampened with hot water to gently scrub the salt over the surface in circular motions.
- Continue Scrubbing: Continue scrubbing until the grease begins to break down and dissolve.
- Add Vinegar for Tough Grease: For enhanced effectiveness, add a few drops of white vinegar to the salt and water before scrubbing.
- Rinse Thoroughly: Rinse the cookware thoroughly with hot water to remove any remaining salt and grease.
- Dry: Dry the cookware with a clean cloth.
- Detail Cleaning: Use a soft brush to clean corners and crevices if necessary.
Removing Blood Stains and Mold from Fabrics with Salt
Blood stains can be particularly stubborn, especially if not treated immediately. Blood contains proteins that bind strongly to fabric fibers, making removal with regular detergents difficult. Mold can also develop on fabrics due to excessive moisture or storage in damp places, leaving stains and unpleasant odors.
Why Salt is Effective for Removing Blood Stains
- Protein Breakdown: Salt helps break down the proteins in blood, making them easier to remove from the fibers.
- Abrasive Action: Salt acts as a gentle abrasive, aiding in scrubbing and removing stains without damaging the fabric.
- Absorption: Salt absorbs fresh blood, helping to lift the stain before it sets.
Why Salt is Effective for Removing Mold
- Antibacterial and Antifungal Properties: Salt has antibacterial and antifungal properties, helping to kill the germs that cause mold.
- Moisture Absorption: Salt absorbs moisture, helping to dry out moldy areas and prevent mold spread.
- Abrasive Texture: Salt grains help scrub and remove mold from fibers without causing damage.
Method for Cleaning Blood Stains with Salt
Ingredients:
- Coarse salt
- Cold water
- Sponge or soft brush
Instructions:
- Soak in Cold Water: Immediately soak the blood-stained fabric in cold water. Avoid hot water, which can set the stain.
- Apply Salt: Sprinkle a generous amount of salt onto the stain after soaking.
- Scrub Gently: Use a sponge or soft brush to gently scrub the salt into the stain in circular motions.
- Soak Again: Soak the fabric in cold water again for 30 minutes.
- Rinse Thoroughly: Rinse the fabric thoroughly with cold water to remove salt and blood residue.
- Wash as Usual: Wash the fabric in the washing machine with regular detergent.
- Air Dry: Avoid using a dryer until the stain is completely removed, as heat can set the stain.
Cleaning Mold from Fabrics with Salt
Ingredients:
- Coarse salt
- Lemon juice
- Warm water
- Soft brush or cloth
Instructions:
- Prepare a Paste: Mix half a cup of salt with enough lemon juice to form a paste.
- Apply Paste: Apply the paste directly onto the moldy spots on the fabric.
- Scrub Gently: Use a soft brush or cloth to scrub the paste gently into the mold in circular motions.
- Sun Dry: Allow the paste to dry completely on the fabric under direct sunlight if possible, as sunlight helps kill mold.
- Rinse Thoroughly: Rinse the fabric thoroughly with warm water to remove paste and mold residue.
- Wash as Usual: Wash the fabric with regular detergent in the washing machine.
- Dry and Store Properly: Dry the fabric in a dry place and ensure proper ventilation to prevent mold recurrence
Other Important Uses of Salt Solutions At Home
Salt is a staple in every kitchen, but its benefits extend far beyond cooking and the main cleaning purposes we discussed. Thanks to its chemical and physical properties, cleaning with salt can be applied in many other daily household tasks. From disinfecting wounds to skincare, salt is a natural and economical solution for various common problems at home. Here are some additional uses of salt in the home:
Disinfecting Wounds with Salt
Open wounds are prone to bacterial infections and inflammation, which can impede healing and lead to health complications. Proper disinfection is crucial to prevent infections and speed up the healing process.
Benefits of Salt in Wound Disinfection:
- Antibacterial Properties: Salt has natural antibacterial properties that help kill germs and bacteria present in wounds.
- Cleaning Dead Tissue: Salt helps clean dead tissue and debris from wounds, promoting faster healing.
- Dehydrating Bacteria: Saline solutions draw fluids out of bacterial and fungal cells, causing them to die from dehydration.
How to Use Salt for Wound Disinfection:
- Dissolve a teaspoon of salt in a cup of warm water to create a saline solution.
- Use the solution to rinse the wound thoroughly.
- Gently pat the wound dry with a clean cloth.
Is Salt Beneficial for Skin Exfoliation?
Yes, salt is beneficial for skin exfoliation due to several properties that make it effective in this area. The granular texture of salt acts as a gentle abrasive that helps remove dead skin cells, promoting cell regeneration and leaving the skin softer and brighter. Additionally, salt has antibacterial properties that help cleanse the skin and reduce acne-causing bacteria, contributing to overall skin health.
How to Use Salt as an Exfoliant:
Ingredients:
- Half a cup of salt
- Half a cup of natural oil (olive oil or coconut oil)
- A few drops of lemon juice (for oily skin)
Instructions:
- Mix the salt with the oil to form a paste.
- Add lemon juice if desired.
- Gently massage the mixture onto the skin in circular motions for 5-10 minutes.
- Rinse with warm water to remove the salt and oil residue.
- Pat the skin dry with a soft towel and apply a suitable moisturizer.
Tips for Using Salt as an Exfoliant:
- Use this scrub once or twice a week for the best results.
- Avoid using salt on cuts or irritated skin.
- Test the mixture on a small patch of skin before using it on the entire face to ensure no allergic reaction.
Benefits of Salt for the Respiratory System
Salt offers several benefits for the respiratory system, whether used in home remedies or salt therapy sessions (halotherapy). Some key benefits include:
- Airway Cleaning: Inhaling salt helps clear the airways of mucus and impurities, making breathing easier and reducing congestion.
- Antibacterial Action: Salt’s antibacterial and anti-inflammatory properties help combat bacterial infections in the respiratory system and reduce inflammation.
- Allergy and Asthma Relief: Salt soothes the mucous membranes, reducing irritation and alleviating symptoms of allergies and asthma.
- Improved Lung Function: Inhaling salty air enhances lung health and improves gas exchange efficiency, boosting overall respiratory function.
- Cough Reduction: Salt helps reduce dry and persistent cough by soothing the throat and airways.
How to Use Salt to Improve Respiratory Health:
- Salt Water Gargle: Mix a teaspoon of salt in a cup of warm water and gargle to soothe the throat and reduce coughing.
- Steam Inhalation: Add a teaspoon of salt to hot water and inhale the steam to clear airways and relieve congestion.
- Salt Rooms: Spend time in rooms with salt-covered walls, inhaling salt-infused air for effective respiratory health improvement.
We hope this comprehensive guide on the versatile uses of salt for cleaning and beyond has answered your questions and inspired you to incorporate these natural solutions into your daily household routines. For more tips, detailed guides, and natural home solutions, be sure to check out our blog. Here’s to a cleaner, healthier, and happier home!
